
AWS onboarding for CoreStack Assessments
Learn how to onboard your AWS cloud accounts to be compatible with CoreStack Assessments.
Introduction
Once you've finished configuring all the necessary prerequisites in your AWS environment, you're ready to onboard your AWS cloud account(s) into CoreStack.
Onboarding is done from within the CoreStack application. While the specific onboarding steps may differ slightly depending on which type of cloud account(s) you want to onboard, in general the process is the same for AWS cloud accounts.
In this user guide, we'll walk you through the onboarding steps for different AWS cloud account types and explain what specific actions must be taken in order to properly enable CoreStack Assessments.
Before you start:
If you haven't yet completed the required prerequisite configurations in your AWS cloud environment, please refer to our AWS prerequisites for CoreStack Assessments user guide, complete the necessary steps, then return to this user guide.
Onboard your AWS cloud account by assuming a role as a Member Account
To proceed with onboarding your AWS cloud account into CoreStack using the Assume Role method for an AWS Member Account, please follow these steps.
Note:
AWS has updated the term for Member Accounts from the former Linked Accounts.
Some areas in the CoreStack UI might still use the term "Linked Account." Please take note of this for your own awareness while we work to update the UI. Thank you!
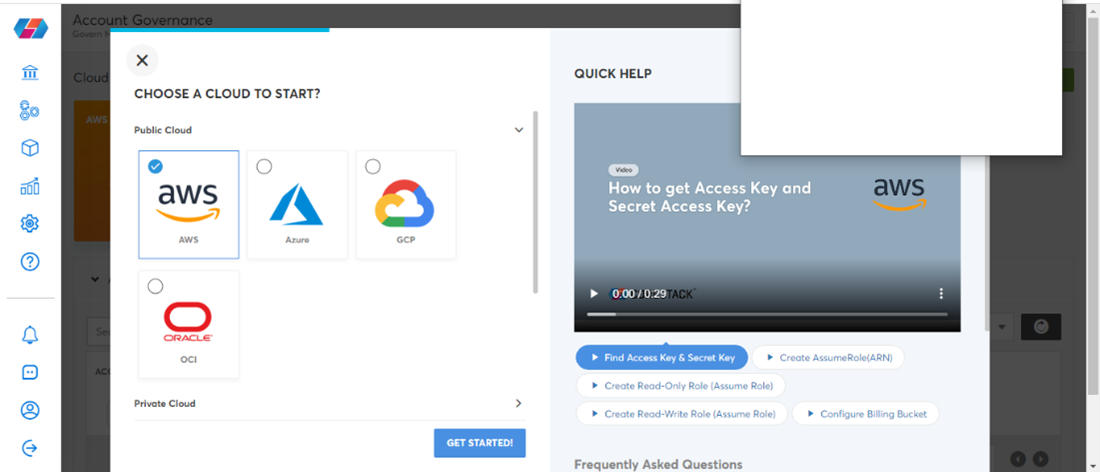
- First, navigate to the Account Governance dashboard view in CoreStack and click on Add New.

- Select AWS, and click on Get Started.
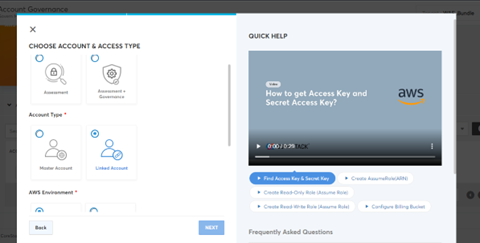
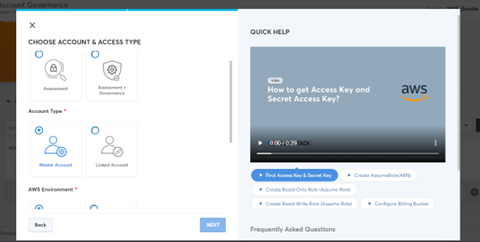
- Under Access type, you can select Assessment or Assessment + Governance. We recommend selecting Assessment since it will allow you to run CoreStack Assessments (with AWS assessment sync) while only providing CoreStack with the minimum levels of access. Selecting Assessment + Governance will provide the same experience and functionality as Assessment.
Note:
As of August 2023 the above statement is true -- however, in future updates there will be notable differences between the Assessment and Assessment + Governance options relating to CoreStack Assessments. This user guide will be updated accordingly at that time.
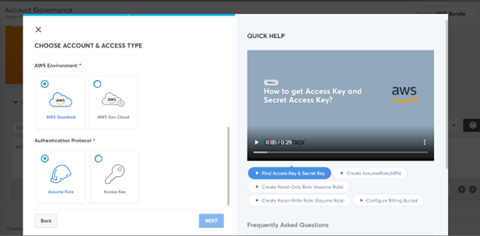
- Select the Linked Account option under Account Type, then select your AWS Environment preference (Standard vs. Gov Cloud), then choose Assume Role under Authentication Protocol.

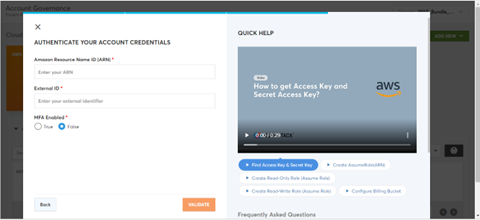
- Fill in the details saved earlier from the AWS console outputs:
- Role ARN: The Amazon Resource Name (ARN) of IAM Role.
- External ID: The external ID can be any word or number that is agreed upon between you and the third-party account.
- Require MFA: Enable this to indicate if the role is restricted with multi-factor authentication (MFA).
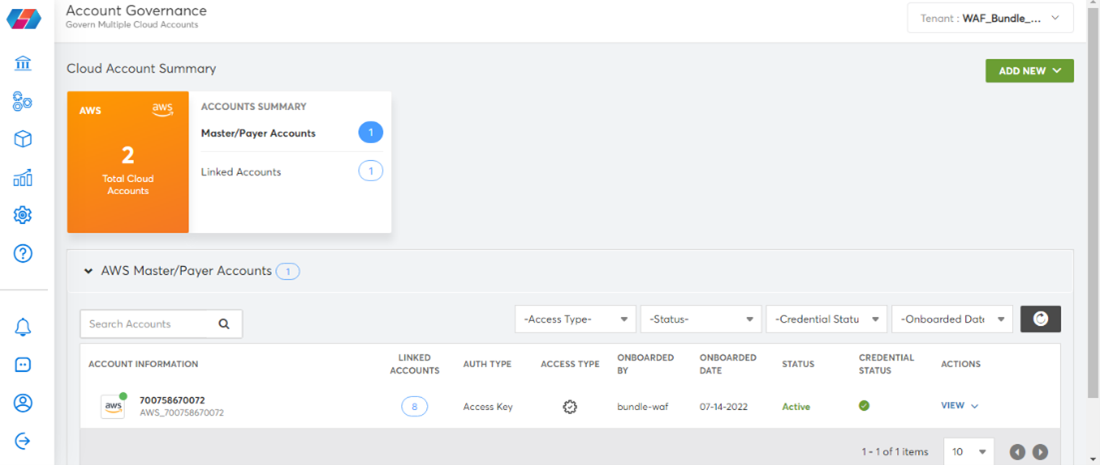
After some time, the details will be validated and the account will be added in CoreStack.
Onboard your AWS cloud account by assuming a role as a Management Account
To proceed with onboarding your AWS cloud account into CoreStack using the Assume Role method for an AWS Management Account, please follow these steps.
Note:
AWS has updated the term for Management Accounts from the former Master Accounts.
Some areas in the CoreStack UI might still use the term "Master Account." Please take note of this for your own awareness while we work to update the UI. Thank you!
- First, navigate to the Account Governance dashboard view in CoreStack and click on Add New.
- Select AWS, and click on Get Started.

- Under Access type, you can select Assessment or Assessment + Governance. We recommend selecting Assessment since it will allow you to run CoreStack Assessments (with AWS assessment sync) while only providing CoreStack with the minimum levels of access. Selecting Assessment + Governance will provide the same experience and functionality as Assessment.
Note:
As of August 2023 the above statement is true -- however, in future updates there will be notable differences between the Assessment and Assessment + Governance options relating to CoreStack Assessments. This user guide will be updated accordingly at that time.
- Select the Master Account option under Account Type, then select your AWS Environment preference (Standard vs. Gov Cloud), then choose Assume Role under Authentication Protocol.
- Fill in the details saved earlier from the AWS console outputs:
- Role ARN: The Amazon Resource Name (ARN) of IAM Role.
- External ID: The external ID can be any word or number that is agreed upon between you and the third-party account.
- Require MFA: Enable this to indicate if the role is restricted with multi-factor authentication (MFA).
- Bucket Name: Specify the S3 Bucket name that is configured in your account to get the
detailed billing data. - Cost Report Format: Select whichever option works best for you.

After some time, the details will be validated and the account will be added in CoreStack.
Onboarding an AWS cloud account as a Management Account using an access key and secret key
Follow the below steps to onboard an AWS cloud account into CoreStack as a Management Account using an access key and secret key.
Note:
AWS has updated the term for Management Accounts from the former Master Accounts.
Some areas in the CoreStack UI might still use the term "Master Account." Please take note of this for your own awareness while we work to update the UI. Thank you!
First, navigate to the Account Governance page in CoreStack, then click on Add New.

- Select the account type, then click on Start Now.

- Choose AWS as the cloud account option, then click on Get Started.

- Under Access type, you can select Assessment or Assessment + Governance. We recommend selecting Assessment since it will allow you to run CoreStack Assessments (with AWS assessment sync) while only providing CoreStack with the minimum levels of access. Selecting Assessment + Governance will provide the same experience and functionality as Assessment.
Note:
As of August 2023 the above statement is true -- however, in future updates there will be notable differences between the Assessment and Assessment + Governance options relating to CoreStack Assessments. This user guide will be updated accordingly at that time.
- Select Master Account as the Account type based on your preferences, then click on Next.

- Fill in the Access key, Secret Key, and any other required information, then click on Validate.

- After validation is completed, the Advanced Settings will be displayed. Fill out these fields according to your preferences, and click I’m Done.

You should see a confirmation message once done.

Onboarding an AWS cloud account as a Member Account using an access key and secret key
Follow the below steps to onboard an AWS cloud account into CoreStack as a Member Account using an access key and secret key.
Note:
AWS has updated the term for Member Accounts from the former Linked Accounts.
Some areas in the CoreStack UI might still use the term "Linked Account." Please take note of this for your own awareness while we work to update the UI. Thank you!
First, navigate to the Account Governance page in CoreStack, then click on Add New.

- Select the account type, then click on Start Now.

- Choose AWS as the cloud account option, then click on Get Started.

- Under Access type, you can select Assessment or Assessment + Governance. We recommend selecting Assessment since it will allow you to run CoreStack Assessments (with AWS assessment sync) while only providing CoreStack with the minimum levels of access. Selecting Assessment + Governance will provide the same experience and functionality as Assessment.
Note:
As of August 2023 the above statement is true -- however, in future updates there will be notable differences between the Assessment and Assessment + Governance options relating to CoreStack Assessments. This user guide will be updated accordingly at that time.
- Select Linked Account for the Account Type, then click on Next.

- Fill in the Access key, Secret Key, and any other required information, then click on Validate.

- After validation is completed, the Advanced Settings will be displayed. Fill out these fields according to your preferences, and click I’m Done.

You should see a confirmation message once done.

Updated 6 months ago