
Optimize Usage - Rightsizing
Introduction
The Right Sizing feature allows users to evaluate selections of cloud instances against actual requirements based on their usage, and get recommendations for the right selection of instances that could help to reduce the overall costs incurred.
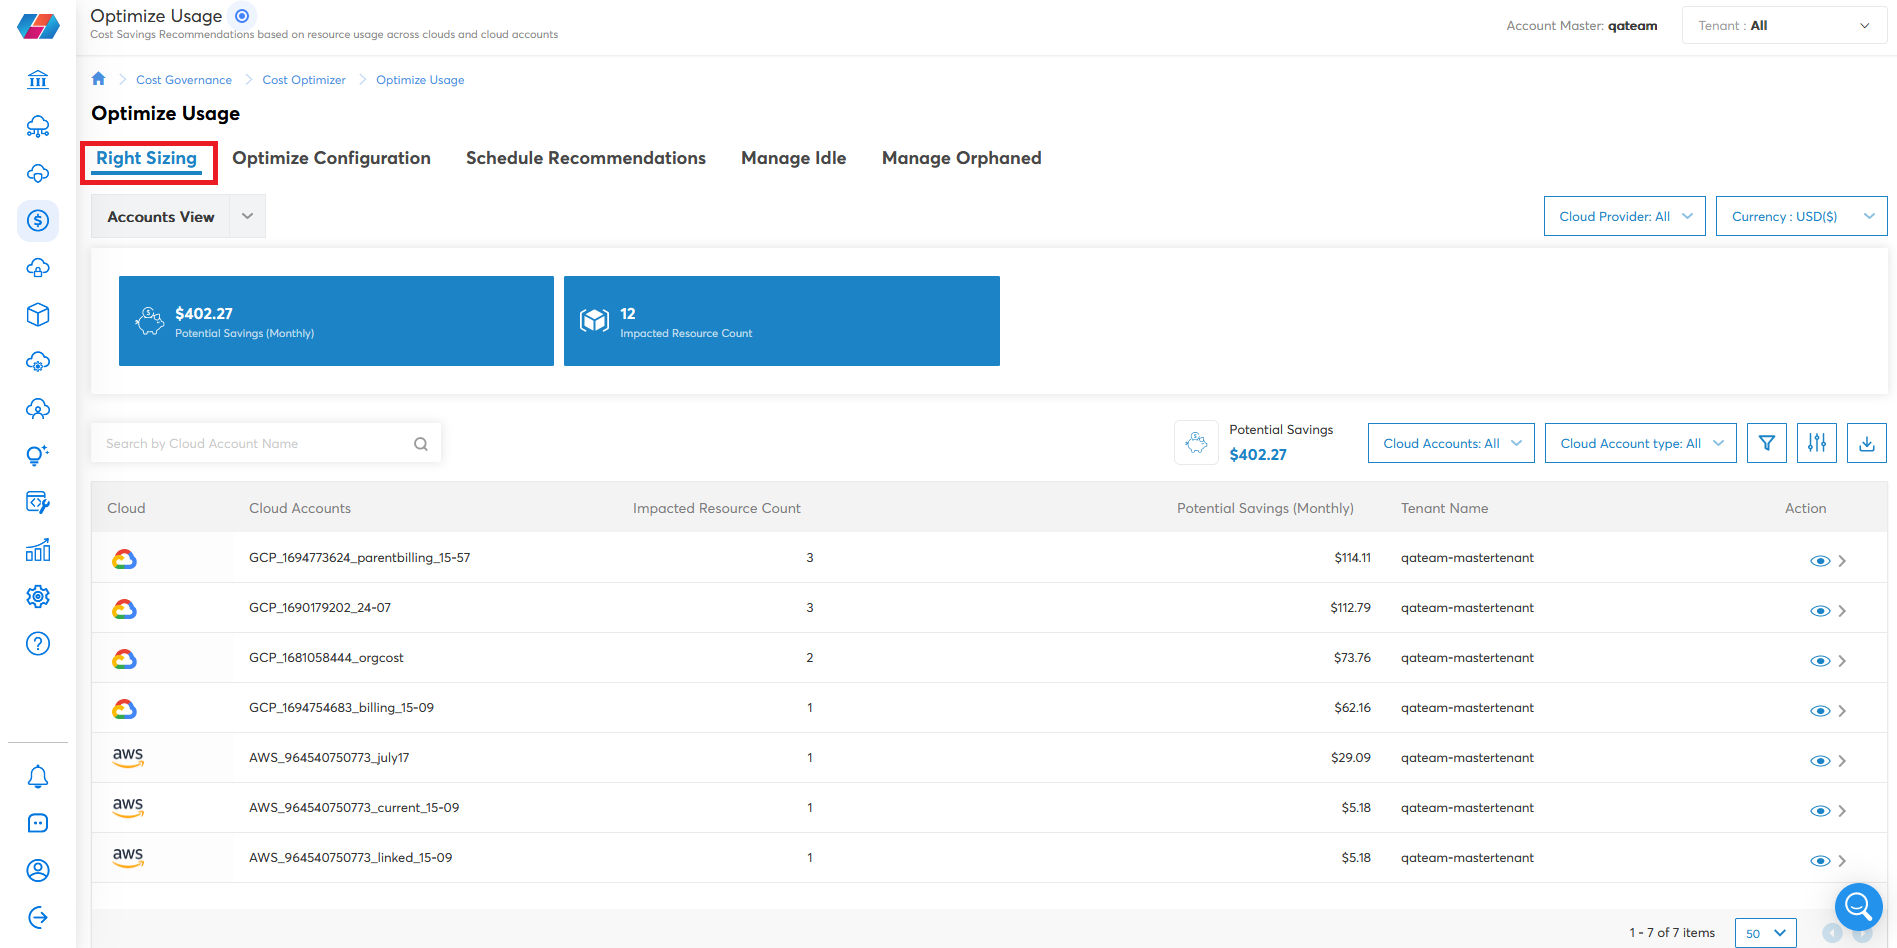
To access this section of the Optimize Usage page, navigate to Cost > Cost Optimizer > Optimize Usage then click on the Right Sizing tab (this is also the default view when navigating to this page).
Right Sizing
With a massive combination of instances offered by cloud platforms like AWS, Google Cloud Platform, and Microsoft Azure, it can be overwhelming sometimes when choosing which platform to use. Right sizing in this case helps to not only deflate cost, but also leads to optimization which yields better operational results.
Using right sizing tools is recommended as they are customized in such a way to analyze your cloud system and enable recommendations in applicable areas. They analyze patterns, instance performances, and also are able to switch off idle instances that are not a perfect match to their specific workload overheads.
Right Sizing has policies designed to find underutilized issues in customer infrastructure called violations.
- Click Right Sizing. The Impacted Resources and Recommendations appear.
CoreStack supports the following resources:
- AWS Route 53
- AWS NAT Gateway
- AWS Dedicated Host
- AWS EFS
- Azure Cache for Redis
- Azure SQL Database
- Azure SQL Managed Instance
- Azure Synapse Analytics
- Azure Logic Apps
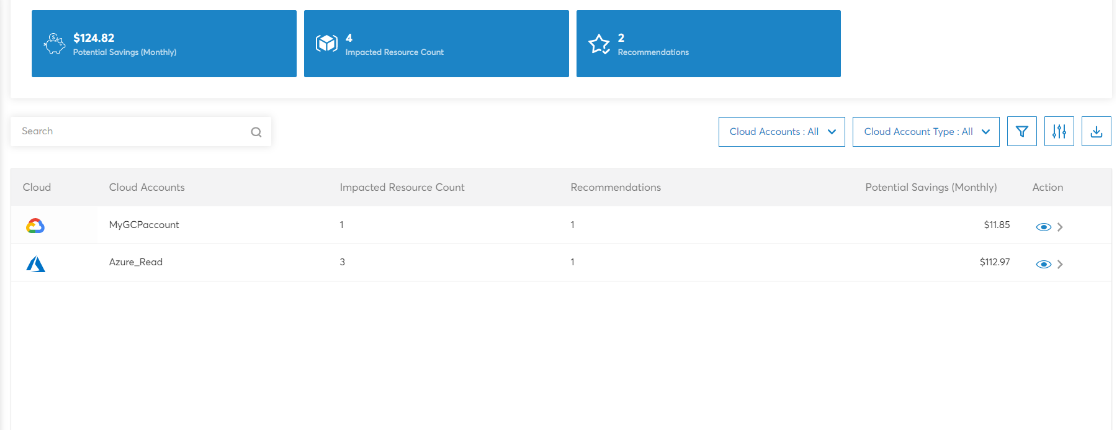
In the example provided below, the customer's CPU utilization is shown by analyzing the last 30 days of cloud account data.
The feature will recommend to move to lower configuration machine, which will save on costs. Here, the Azure cloud account has three Impacted Resources -- which is underutilized for this cloud account -- and one Recommendation.
Once our recommendation is applied, $112.97 is saved.
- In the Cloud Provider list, click to select the required cloud providers and then click Apply, and in the Currency list, click to select a currency.
The Optimize Usage screen shows the cloud account type, account name, impacted resource count, potential savings, tenant name, and the action icon. - Under the Actions column, click the eye icon corresponding to a cloud account and take the required action on a resource.

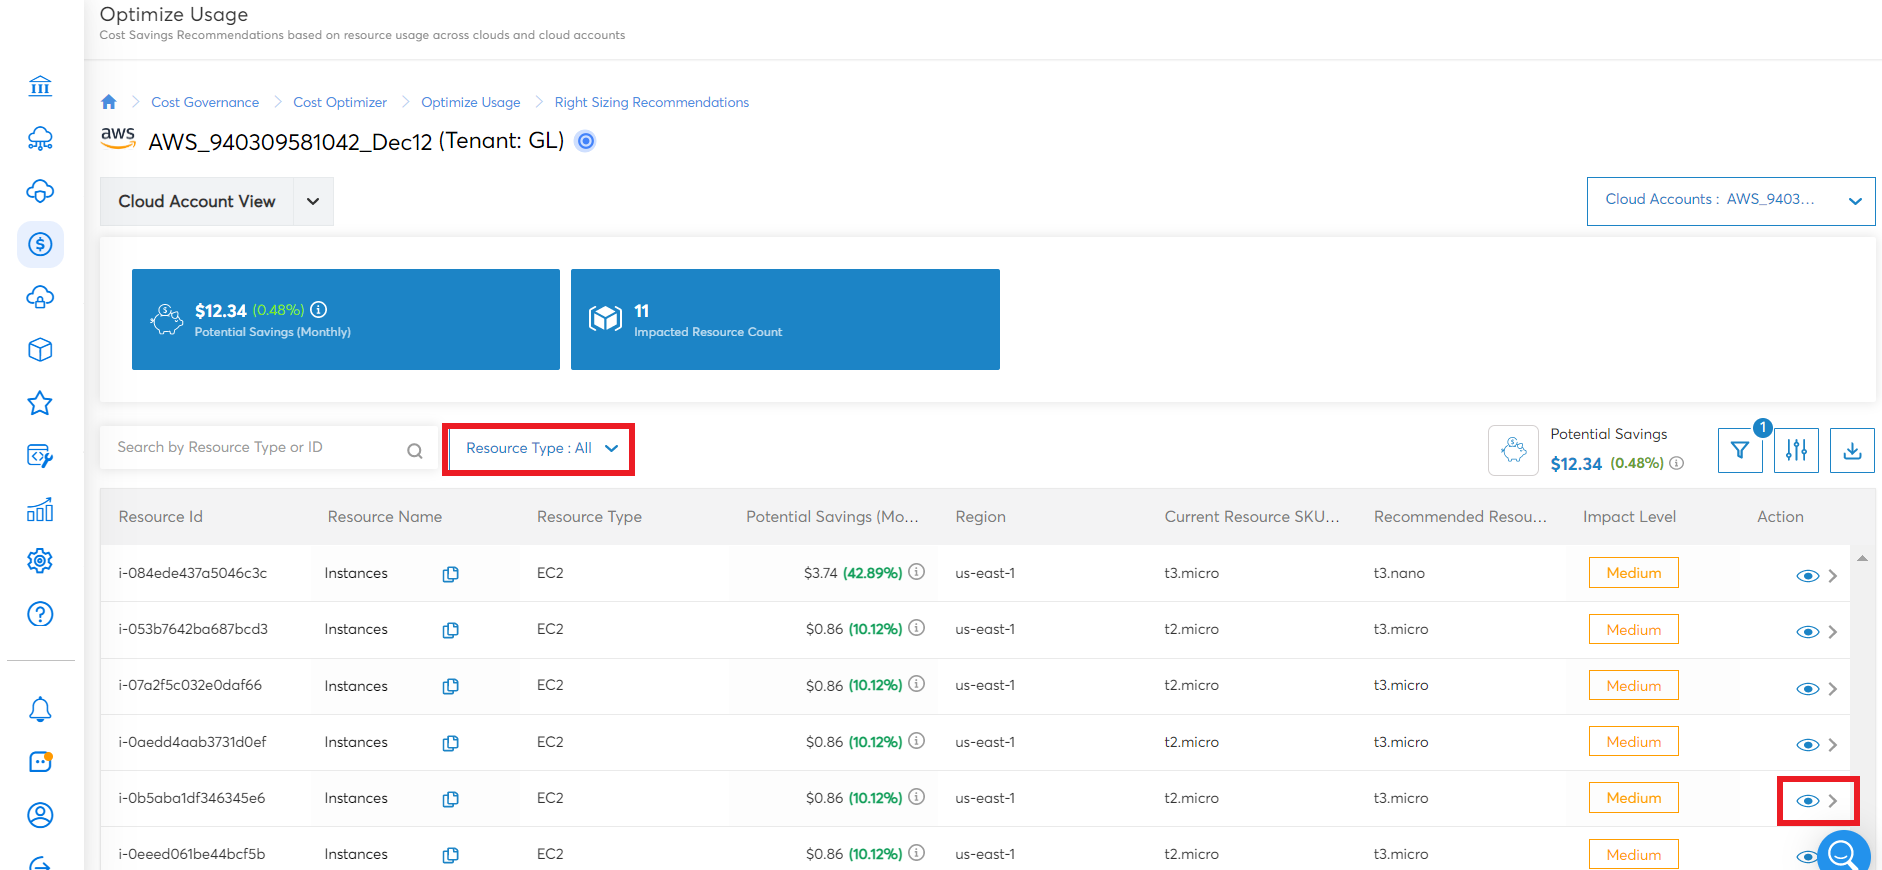
For the selected cloud account, all the available resource details are displayed. - To view recommendation details for a particular resource, under the Action column, click the eye icon.
The resource utilization, saving recommendations, and actions to be taken should appear. You can choose any of these recommendations.
Note:
To filter and view specific details for a particular resource type, in the Resource Type list, the user can select a particular resource type and then click Apply.
| Field | Description |
|---|---|
| Resource Id | The identifier number that Project assigns to each resource. |
| Resource Name | This is the name of the resource. |
| Resource Type | Virtual machines (VM). |
| Potential Savings (Monthly) | Measure monthly cloud savings. |
| Region | The data center's geographic location. |
| Current Resource SKU | The current cloud instance's unique code. |
| Recommended Resource SKU | The recommended cloud instance's unique code. |
| Impact Level | The sensitivity of the information to be stored. |
| Optimization Type | The optimal configuration action. |
| Optimization Status | The optimal configuration status. |
| Recommendation Created On | Date when the recommendation was created. |
| Recommendation Source | The source of the recommendation. |
| Average CPU (%) | Average CPU utilization. |
| Maximum CPU (%) | Maximum CPU utilization. |
| Average Memory (%) | Average memory utilization. |
| Maximum Memory (%) | Maximum memory utilization. |
| Average Network In (bytes) | Average network input in bytes. |
| Maximum Network In (bytes) | Maximum network input in bytes. |
| Average Network Out (bytes) | Average network output in bytes. |
| Maximum Network Out (bytes) | Maximum network output in bytes. |
Note:
The column fields and its data will change based on the resource type. The above column fields are applicable for VMs across all cloud providers.
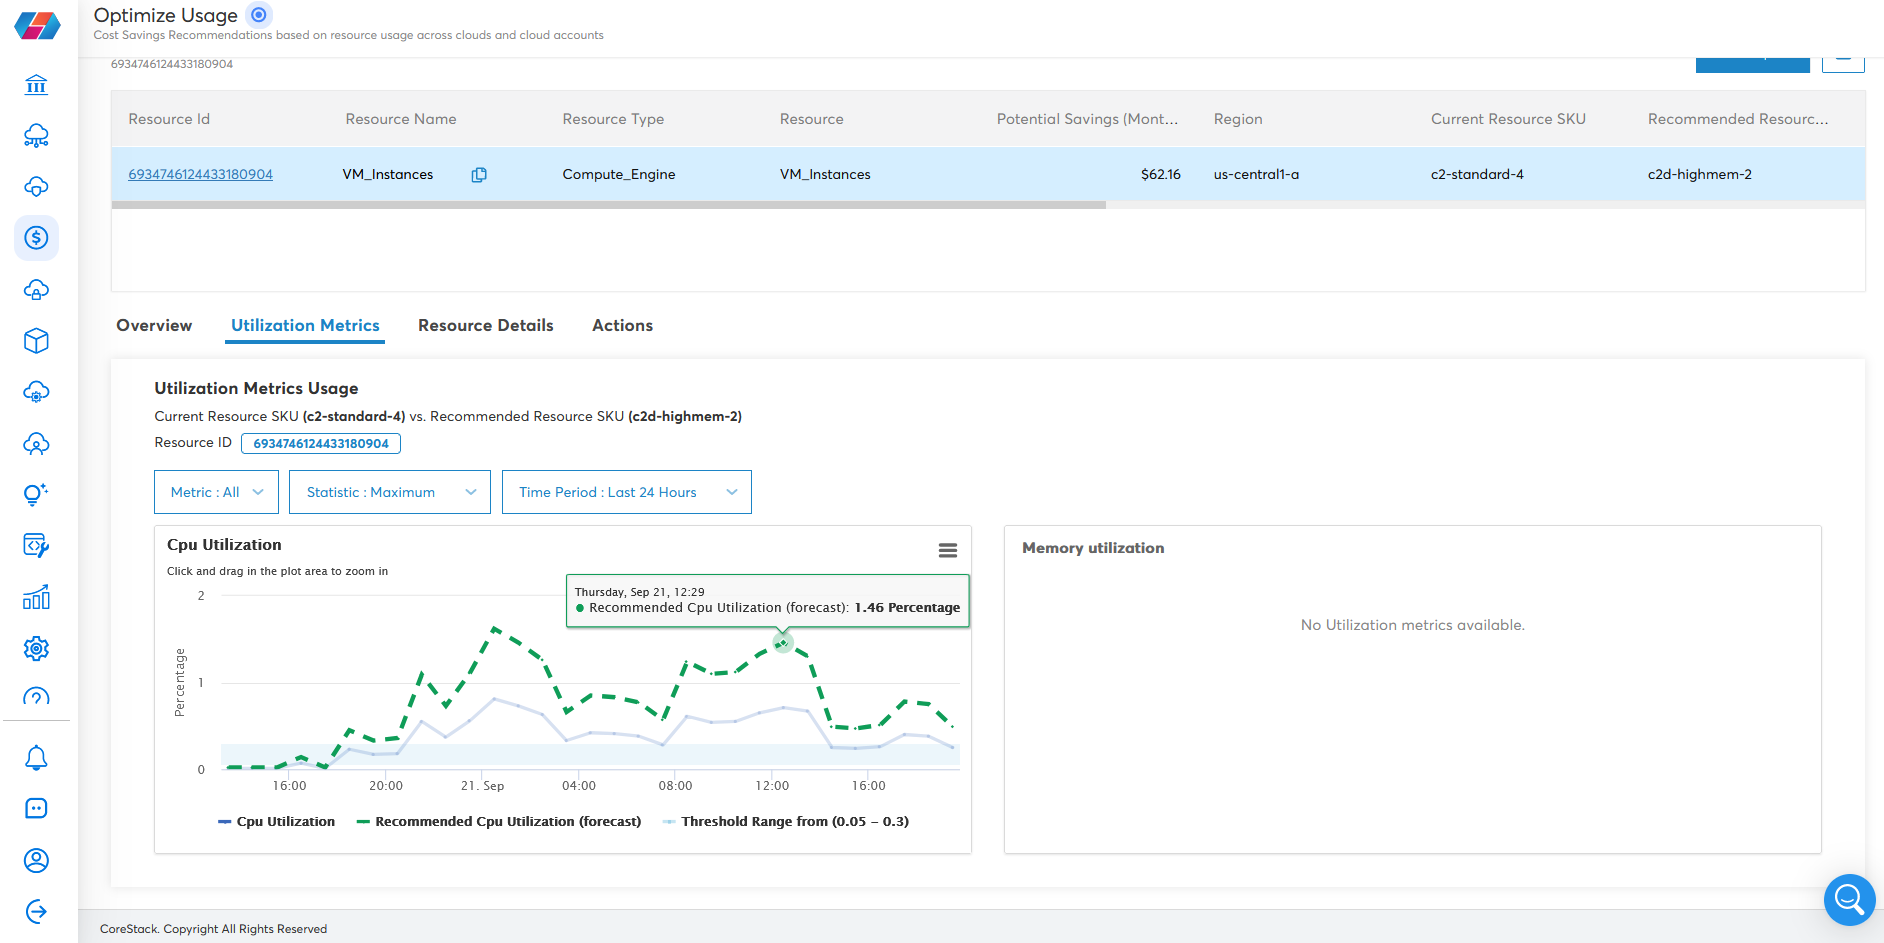
- Click Utilization Metrics. The CPU utilization appears.
- Select Statistic type.
- Select Time Period type.
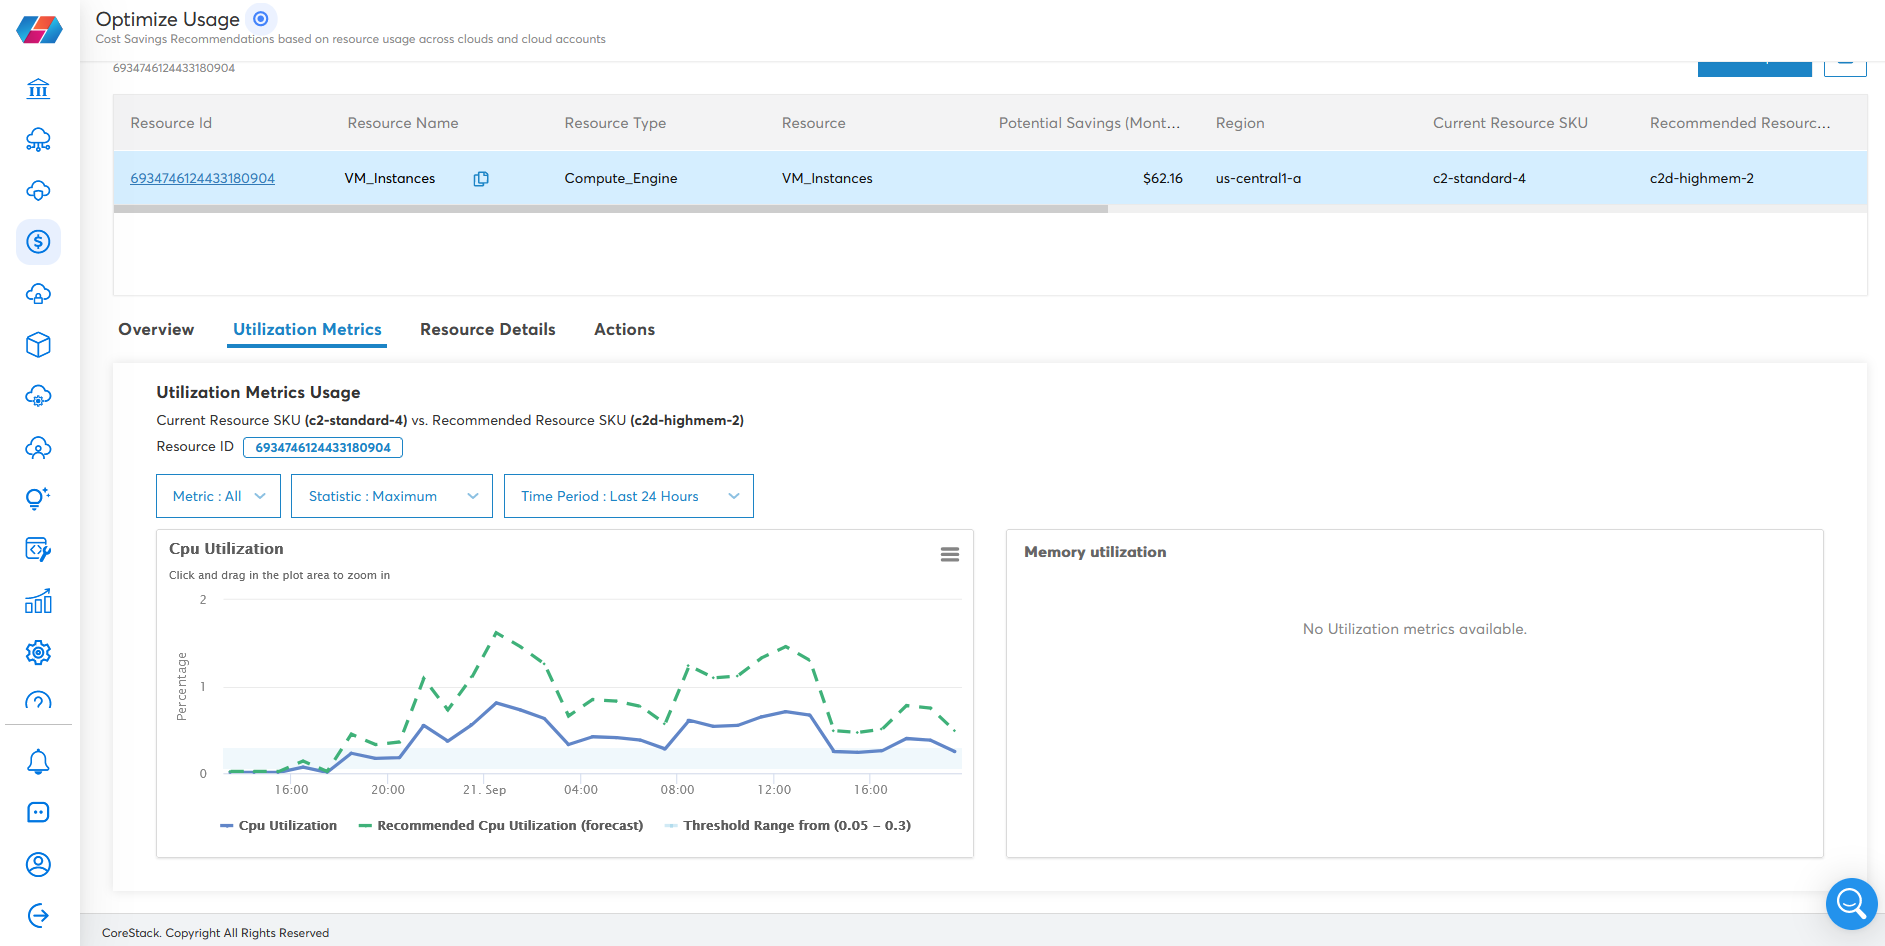
The Green lines represents the Recommended Utilization, and the Blue line represents the current CPU Utilization. Utilization will typically go up after applying any recommendations and any costs are officially saved.
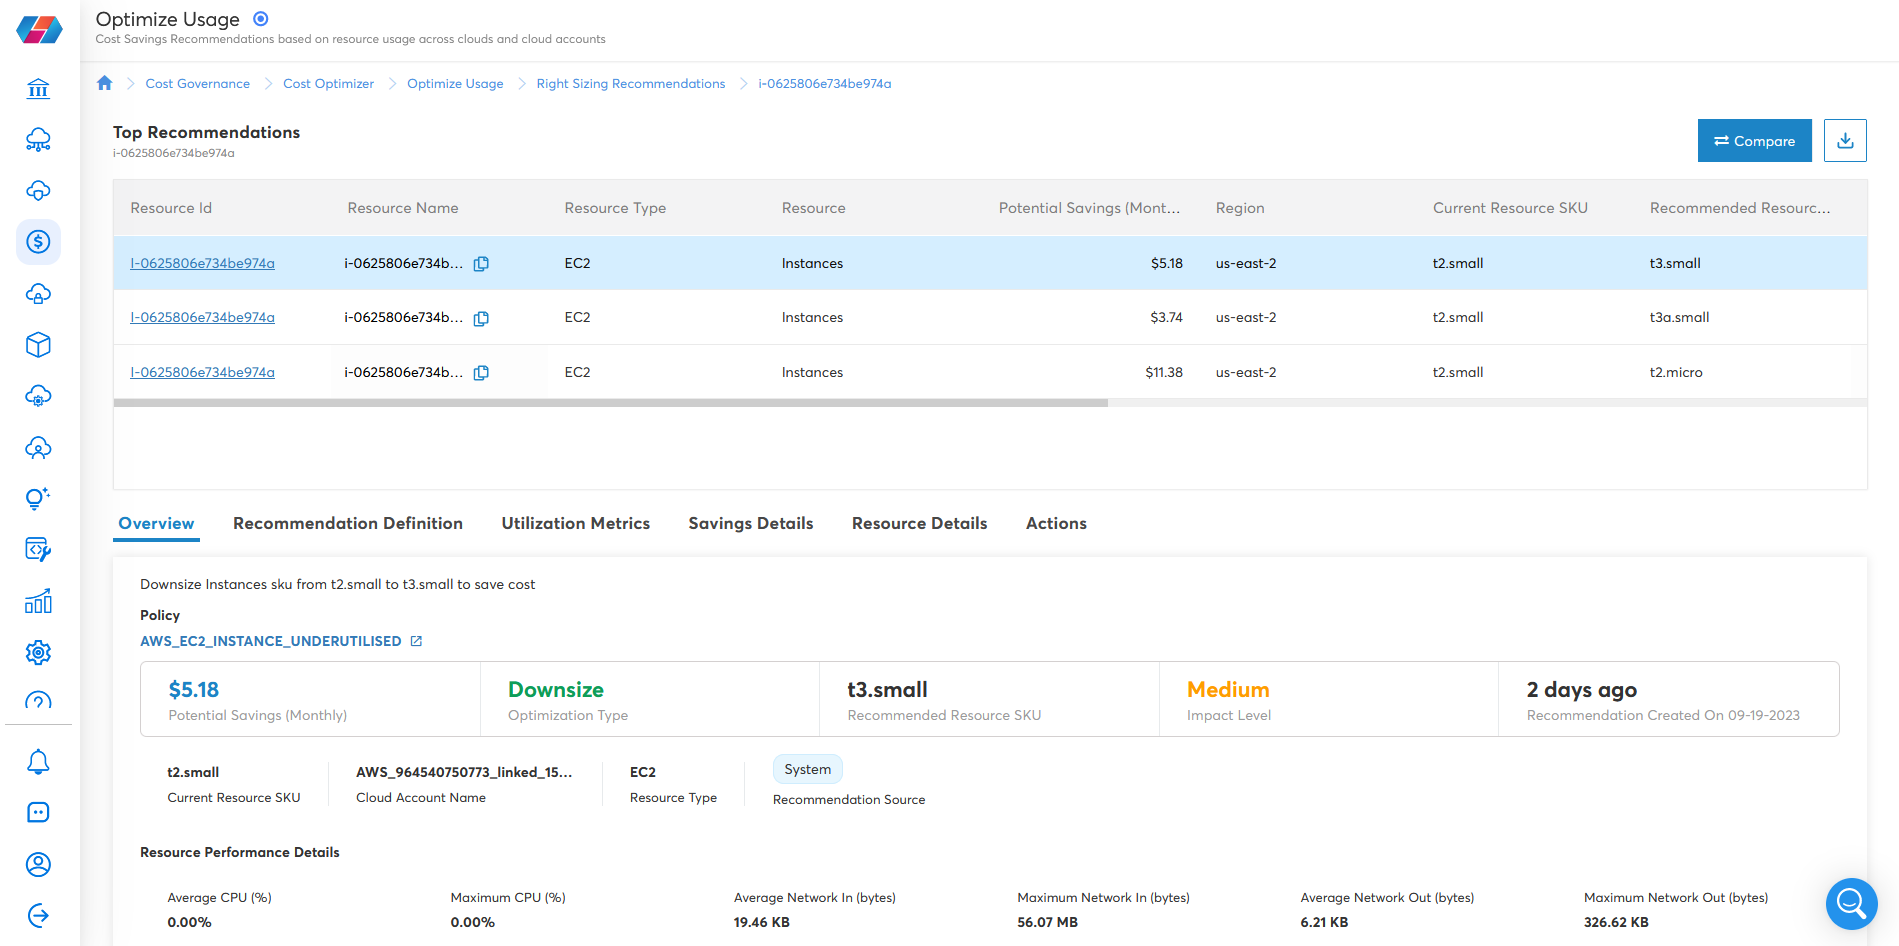
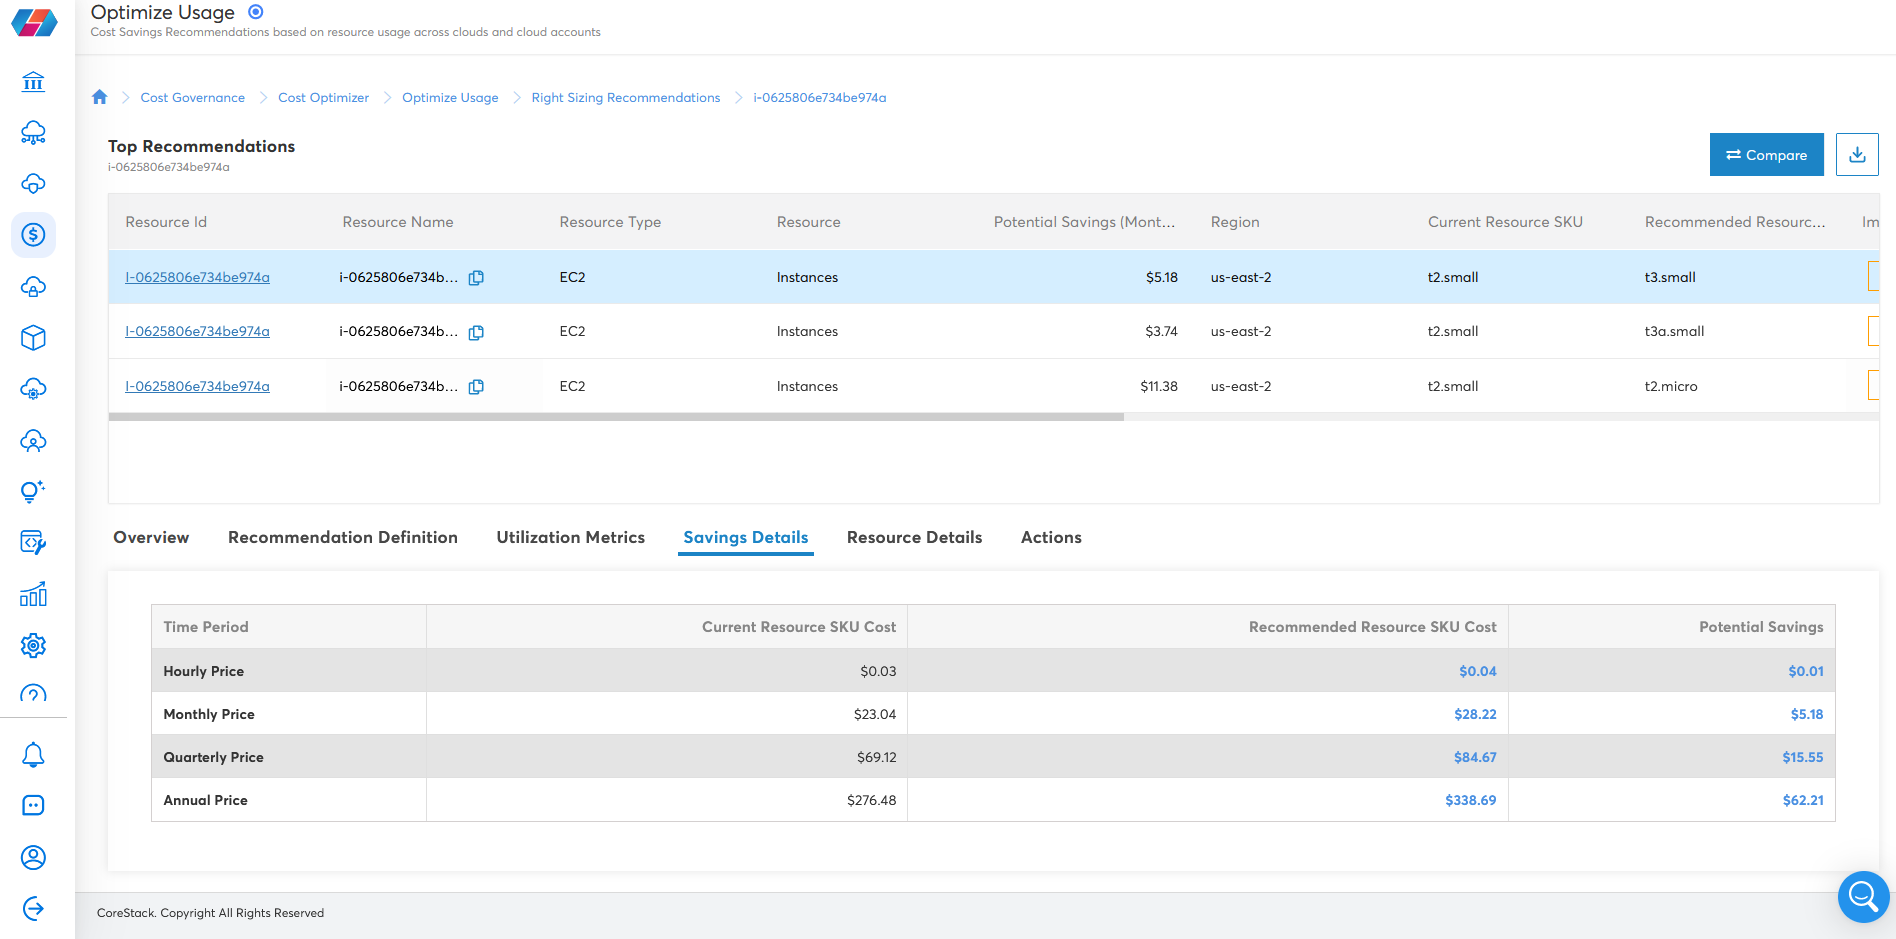
- Click Savings Details. As we can see, the Recommended Resource SKU cost is lower than the Current Resource SKU cost.
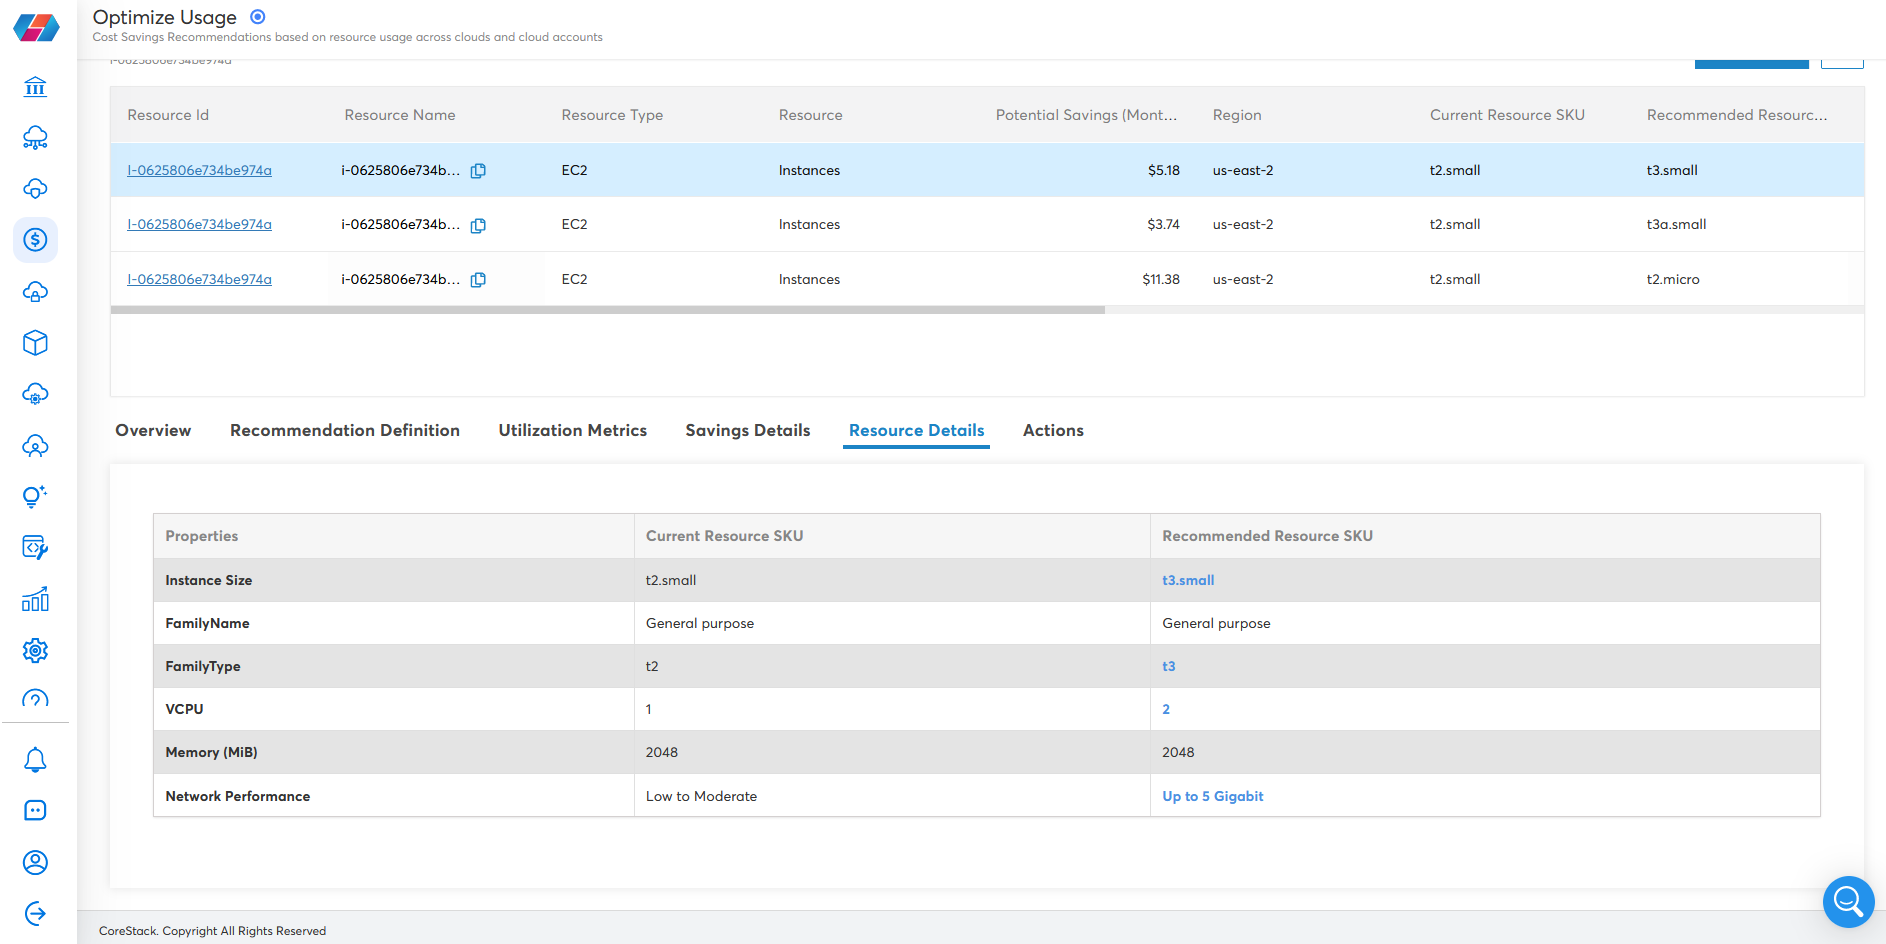
- Click Resource Details. The SKU details appear. There are four VCPU in the Current Resource SKU, and two in the Recommended Resource SKU. The SKU is therefore reduced.
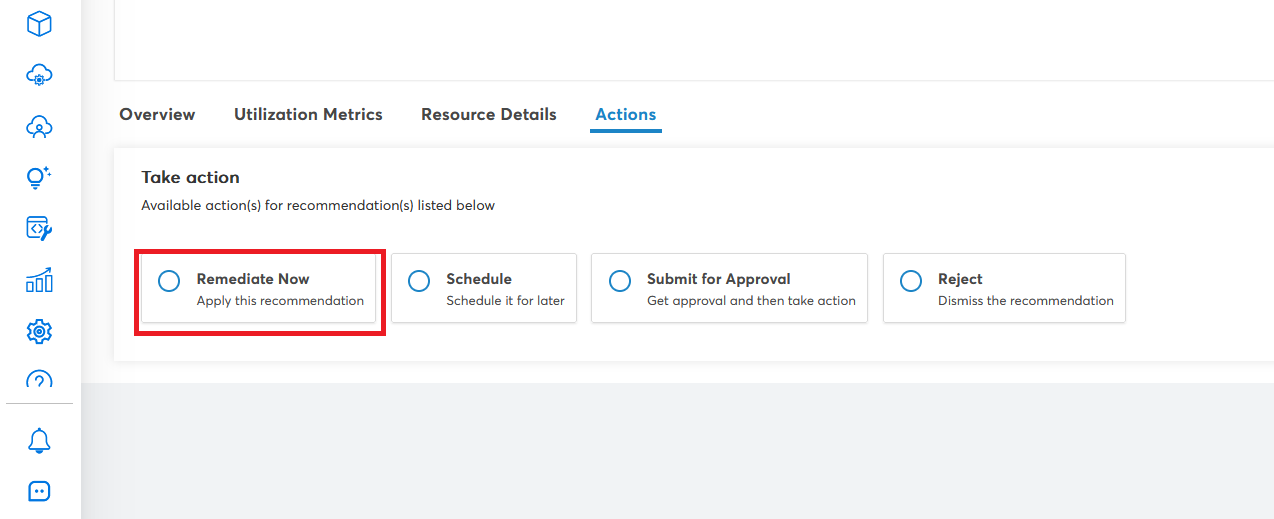
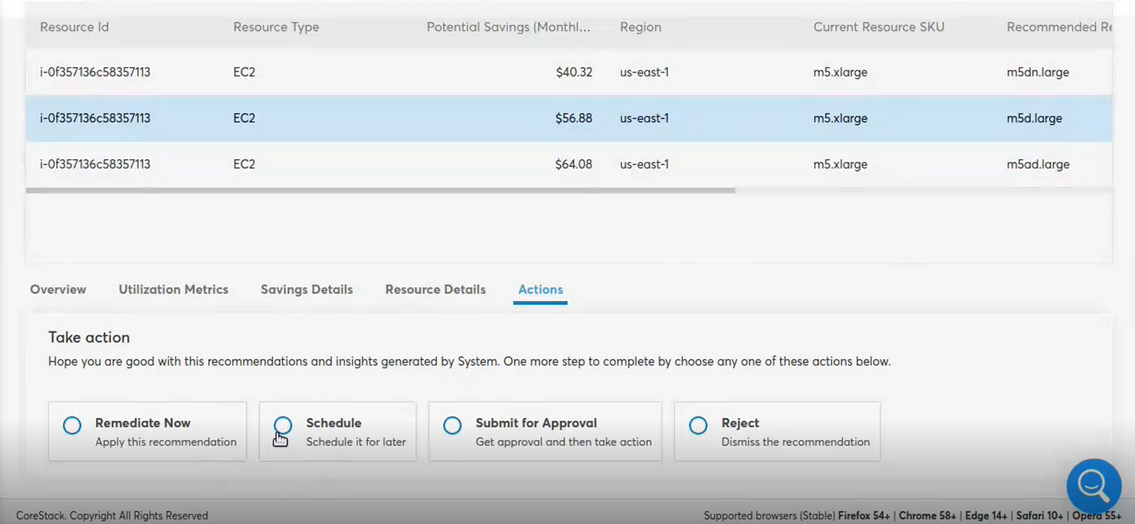
- Select a recommendation and Click Actions.
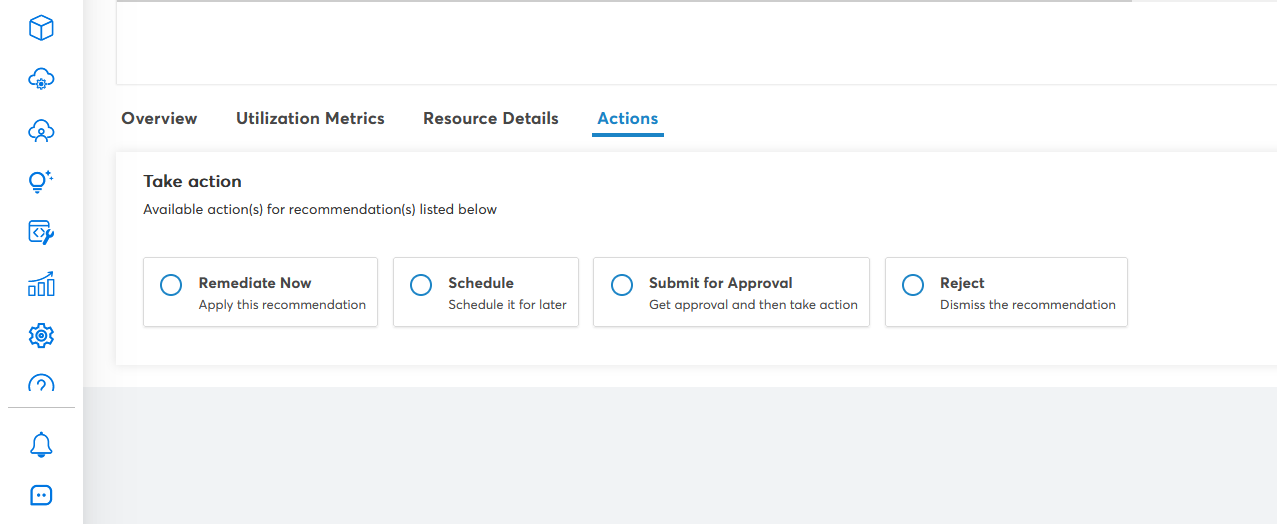
- Click Remediate Now.
- You will get a confirmation message once this recommendation is successfully executed. Enter an Email Address as the recipient and write a Message to be included in the notification.
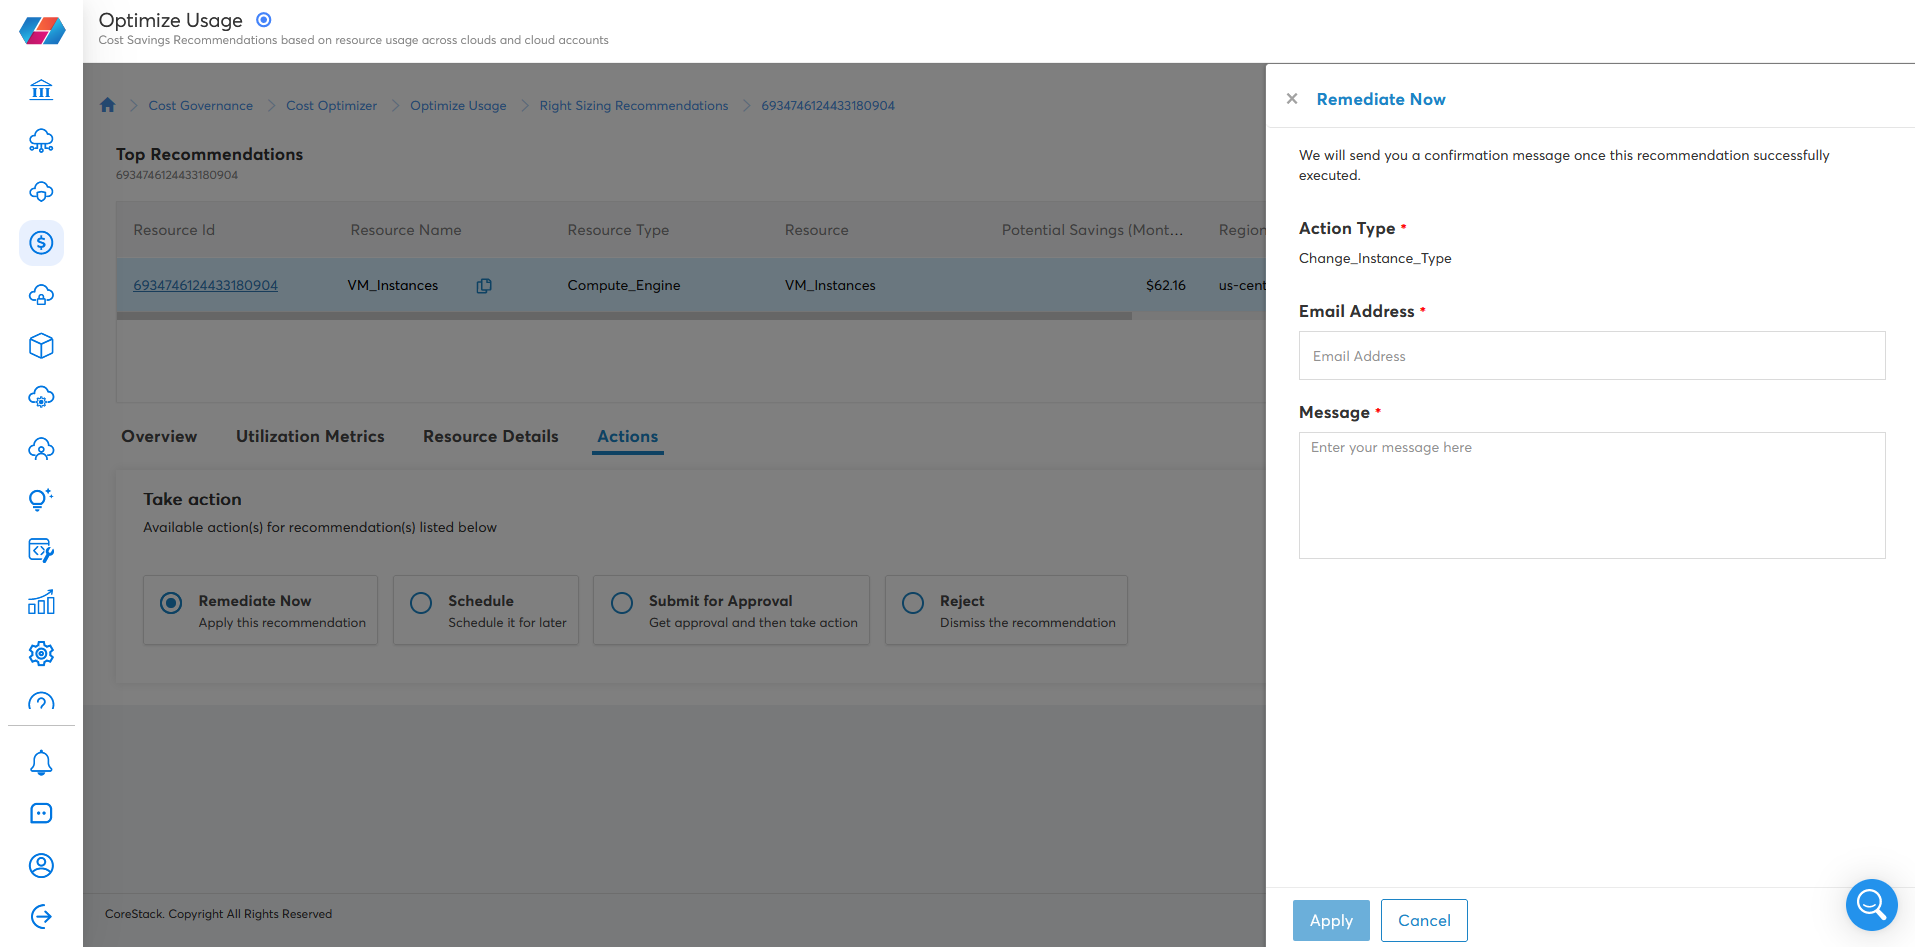
Once the action is implemented, it moves the current resources to the recommended resources.

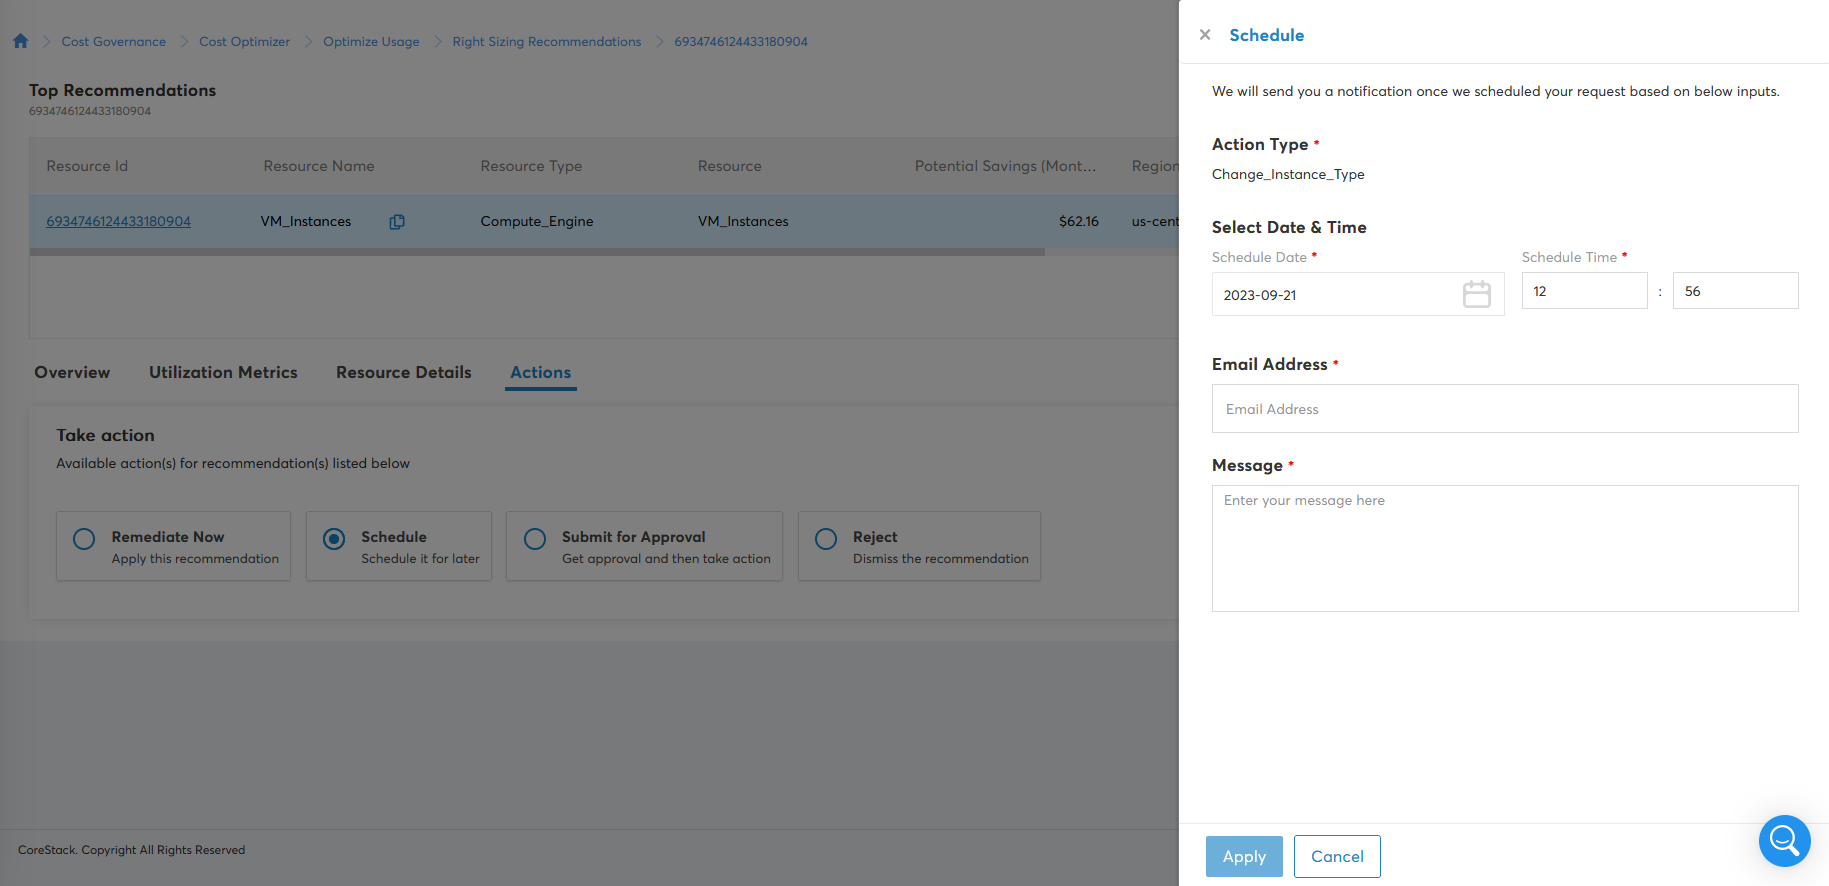
- Click Schedule, to schedule the recommendation. Enter the details.
The notification is then sent to the recipient.
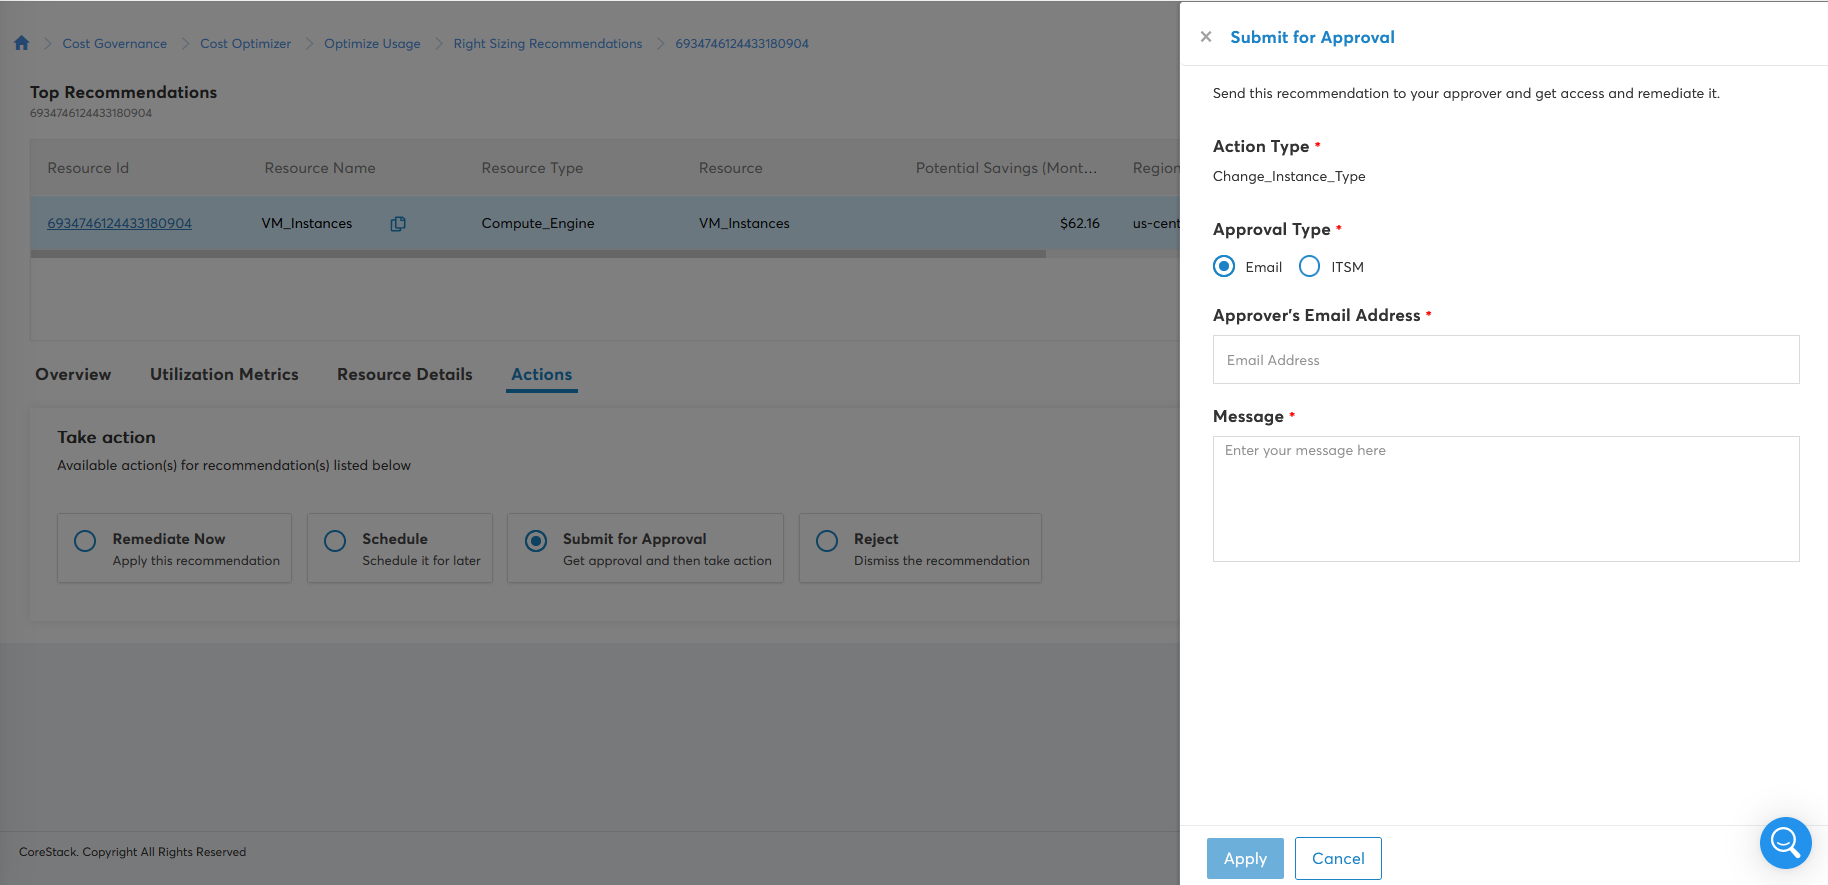
- Click Submit for Approval. This will then send the notification email to move the virtual machine(s).
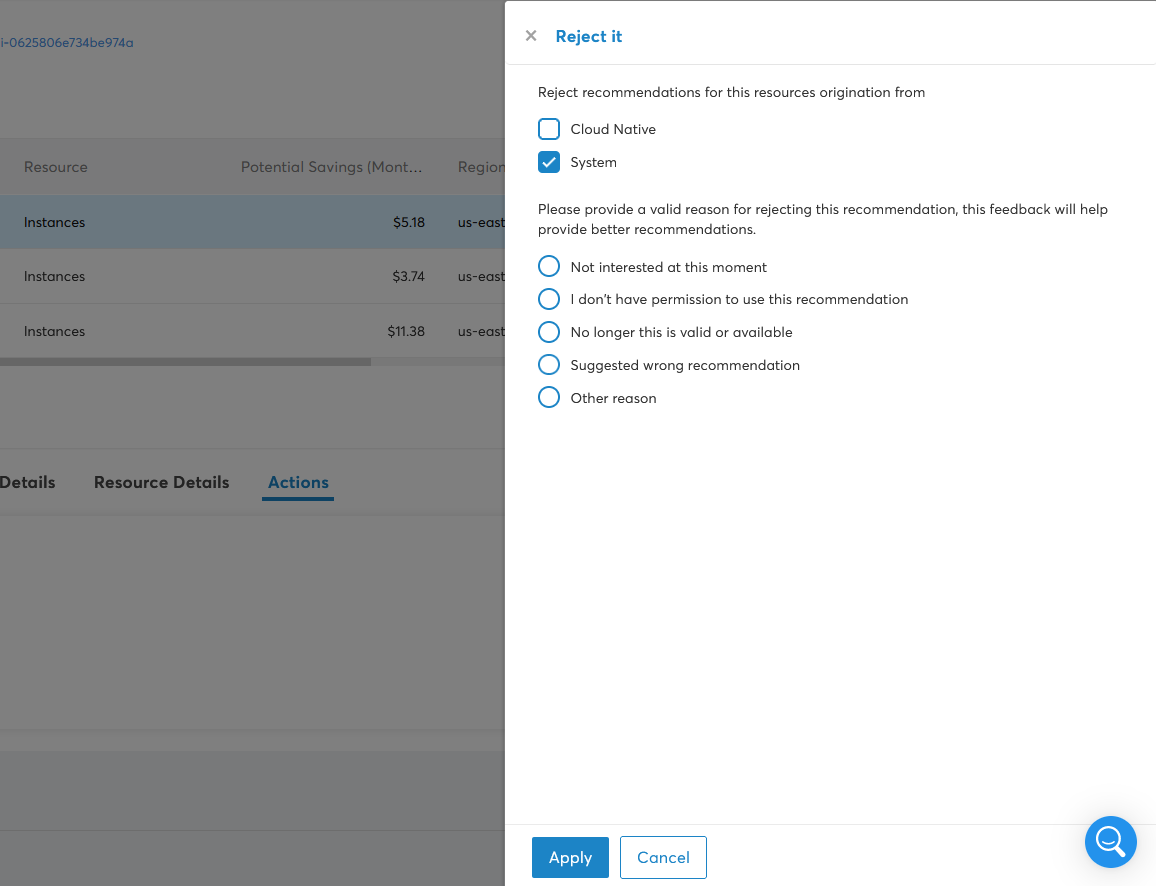
- Click Reject, to reject the recommendation.
You can exclude a resource from future recommendation by rejecting the recommendation. This rejected recommendation can be tracked under the Optimization Actions screen. You can also re-activate a rejected recommendation.
Recommendation Source
Cloud native: This option allows you to ignore any future recommendations for this resource originating only from cloud-native sources.
System: This option allows you to ignore any future recommendation for this resource origination only from cloud-native sources or CoreStack.
You can provide a reason for rejecting the recommendation by selecting from a list of options or you can provide reason in the other reason section.
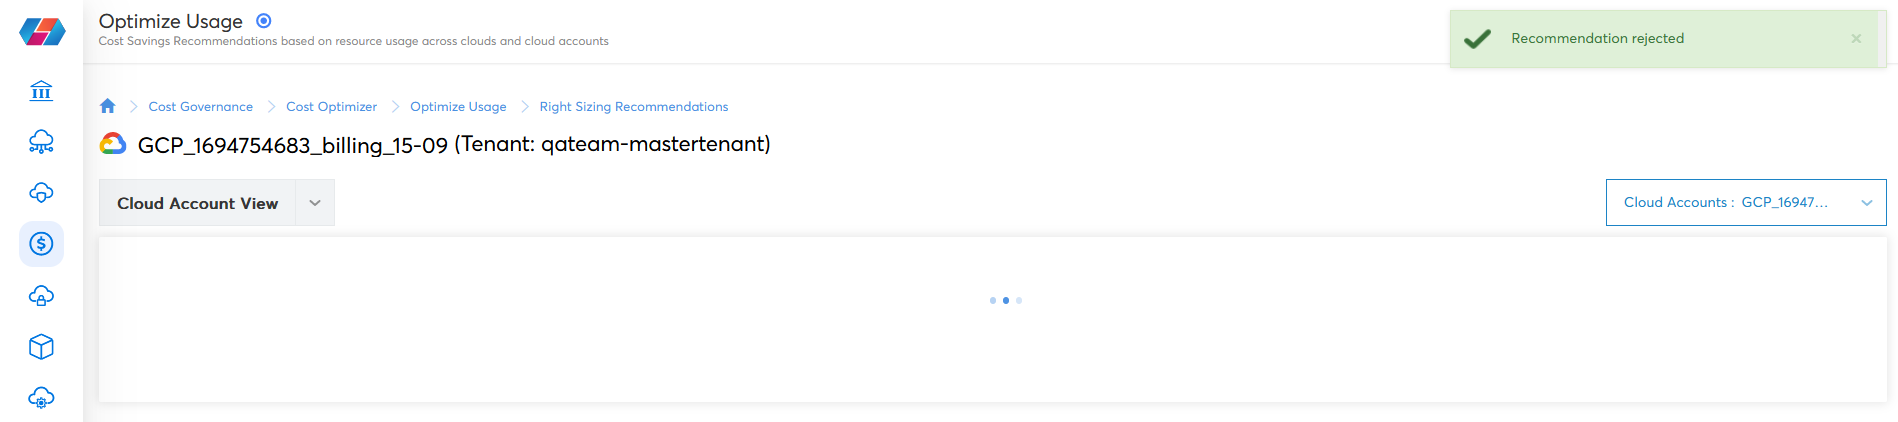
Click Apply to reject a recommendation . Once a recommendation is rejected, a pop up message appears: Recommendation rejected.
You can find the rejected recommendations in the Optimization Actions screen.
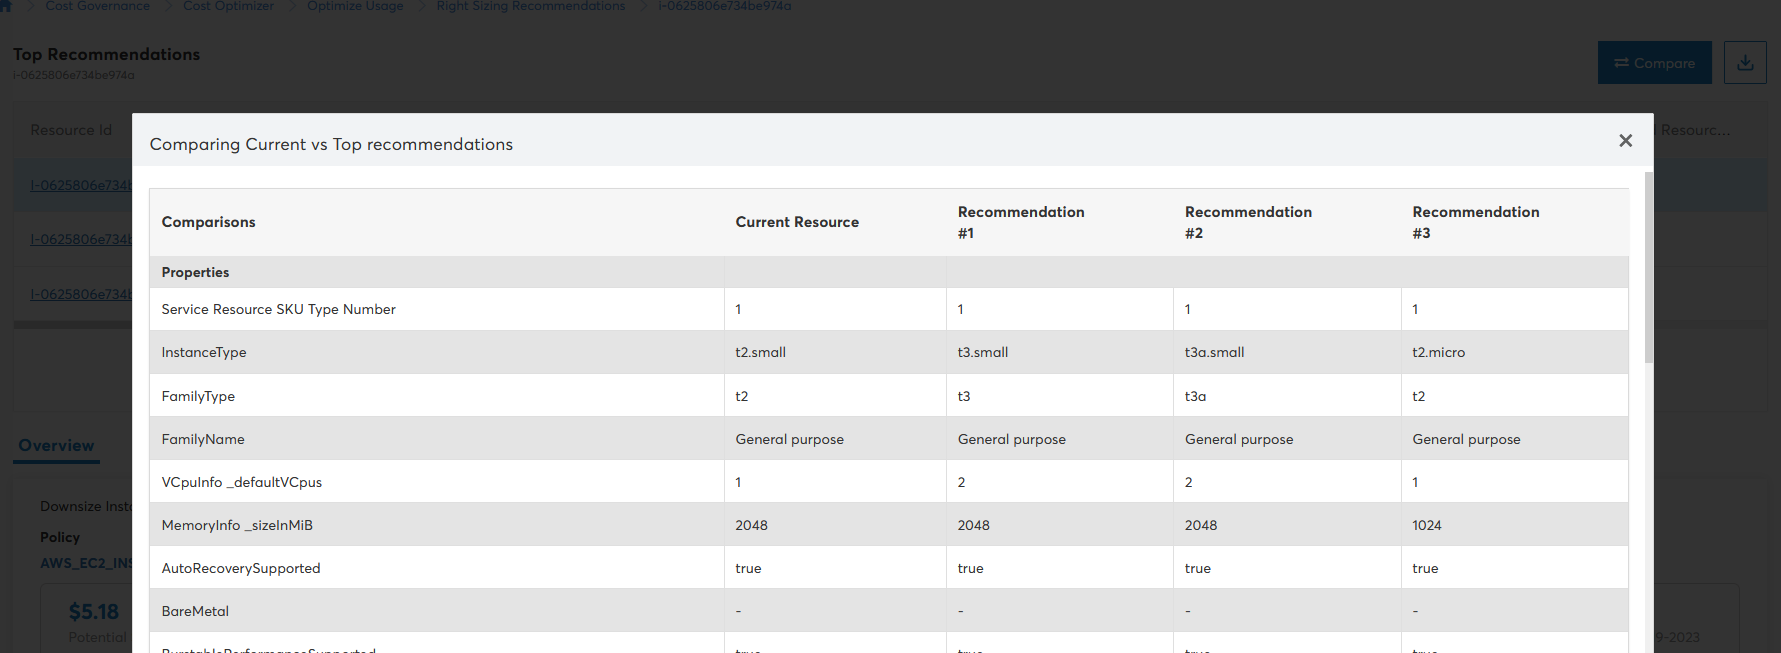
Click Compare. The recommendations comparison will appear.

You can compare the recommendations and make any decisions accordingly, based on your needs.
Updated 6 months ago